
This page contains affiliate links. If you purchase through these links, we may earn a small commission at no extra cost to you. Full disclosure.
Smart Birdhouse
Build a wooden birdhouse with a WiFi bird-cam and dusk-activated LED lighting. Two independent circuits — one streams live video, the other lights up at dark.
Jump to Materials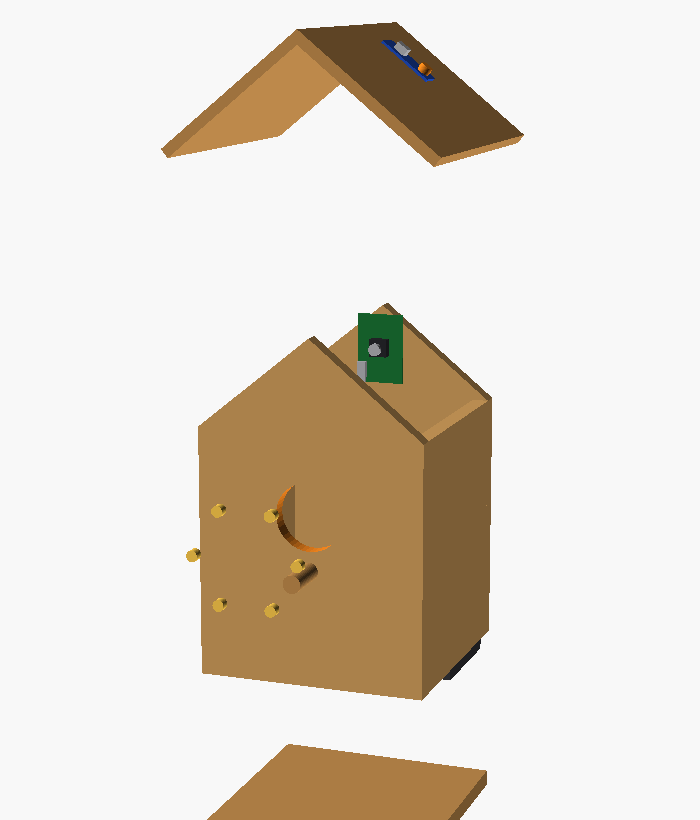
Build a wooden birdhouse with a WiFi bird-cam and dusk-activated LED lighting. Two independent circuits — one streams live video, the other lights up at dark.
Breadboard prototyping, soldering, reading schematics, transistor switching circuits, Arduino IDE, WiFi streaming, woodworking, weatherproofing, bird habitat design
Adult-led build
Materials List
- Wooden birdhouse kit (pre-cut) $10–40 View
- ESP32-CAM-MB programmer (USB/CH340) $4 View
- microSD card (≤32 GB, FAT32) $5 View
- 5V power bank (10,000 mAh) or 5V/2A adapter $10 View
- LM393 photoresistor module $1 View
- Warm-white LEDs (5 mm) × 3–6 $1 View
- BC547 NPN transistor $0.10 View
- Resistors (150 Ω per LED + 1 kΩ for base) $1 View
- Breadboard + perfboard + 22 AWG wire + heat-shrink $5 View
- Wood glue, sandpaper, water-based sealant, silicone $5 View
Tools Needed
Adult help required for soldering, drilling, and any cutting. Safety glasses mandatory. Check every joint against the wiring diagram before powering on. If real birds will nest, use IR LEDs for invisible night vision — do not light the interior at night.
What You’re Building
Two completely separate circuits inside a wooden birdhouse:
- WiFi Bird-Cam — An ESP32-CAM streams live video to your phone over home WiFi. Point your browser at its IP address and watch birds come and go in real time.
- Dusk-Activated Light — A photoresistor + LM393 comparator switches warm LEDs on when it gets dark. No code required — just adjust the trim pot at dusk.
Keeping the circuits apart sidesteps an ESP32-CAM quirk (its analog pins stop working once WiFi is on) and lets you build and test each half independently.
Do I Need to Cut Wood?
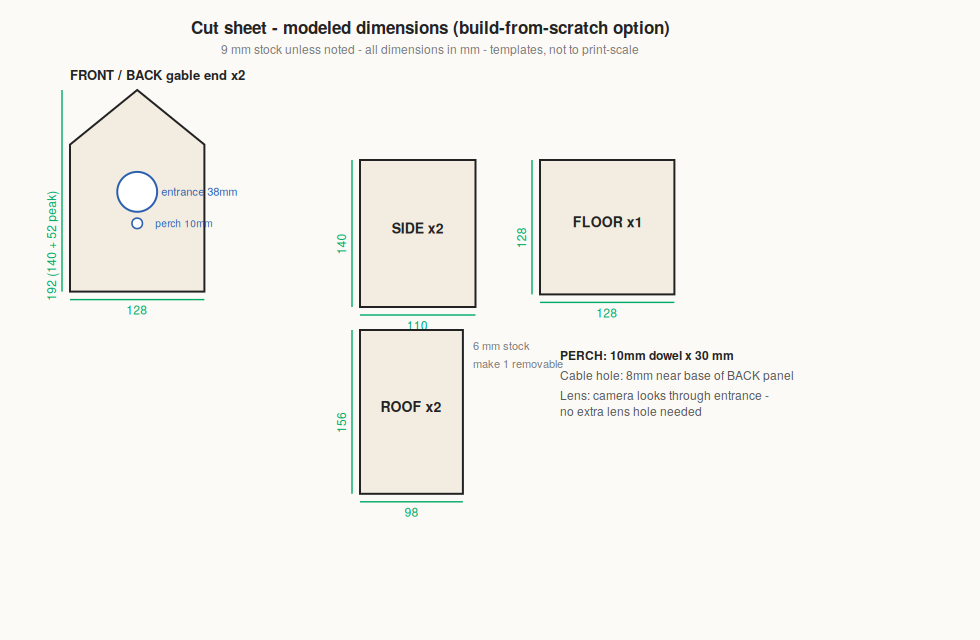
Nope — a pre-cut birdhouse kit is the easiest route. Look for the SainSmart Jr. or Kraftic kits on Amazon. If you prefer to cut your own, use the cut-sheet dimensions below:
| Part | Qty | Size (mm) | Stock |
|---|---|---|---|
| Floor | 1 | 128 × 128 | 9 mm |
| Front / back gable | 2 | 128 × 192 (140 + 52 peak) | 9 mm |
| Side | 2 | 110 × 140 | 9 mm |
| Roof panel | 2 | 98 × 156 | 6 mm |
| Perch dowel | 1 | ∅10 × 30 | Dowel |
Step-by-Step Instructions
Step 1: Floor / Base
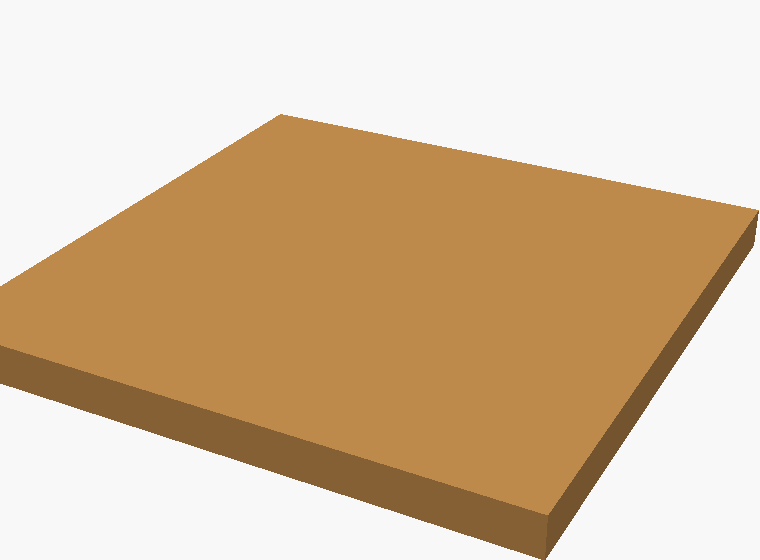
Sand the base smooth, dry-fit all panels to check alignment, then glue the floor down flat and square. Every other panel references it, so take your time here.
Step 2: Four Walls
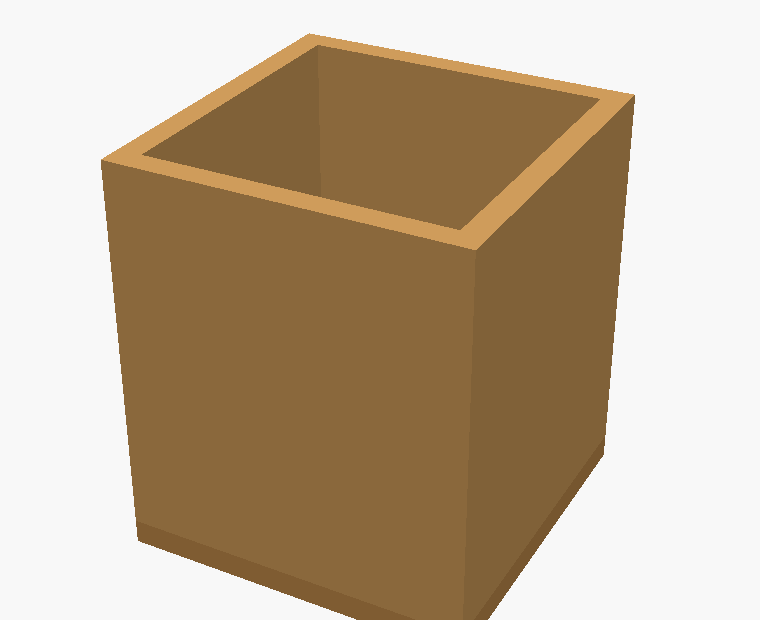
Glue the front, back, and two sides onto the floor. Check each corner with a set square and clamp while the glue sets. Leave the roof off — you need the box open for electronics later.
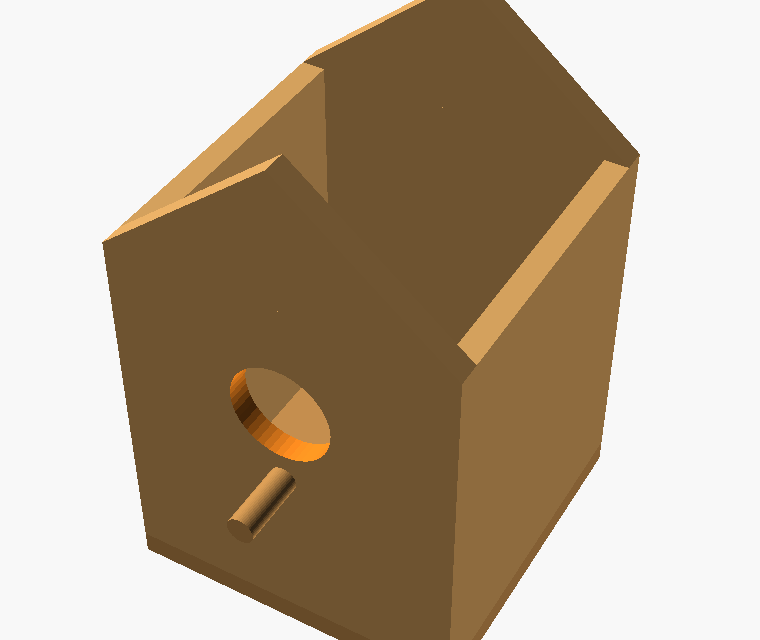
Step 3: Entrance, Perch & Gable
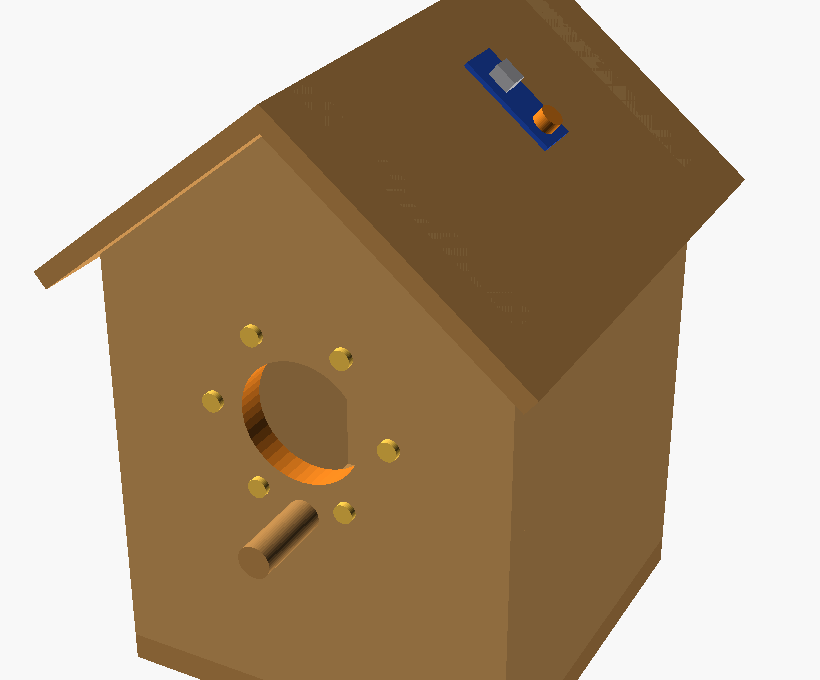
Drill the entrance hole (32 mm for chickadees/wrens, 38 mm for bluebirds), glue the perch dowel just below it, and add the gable peak pieces. The shell is complete but still open-topped.
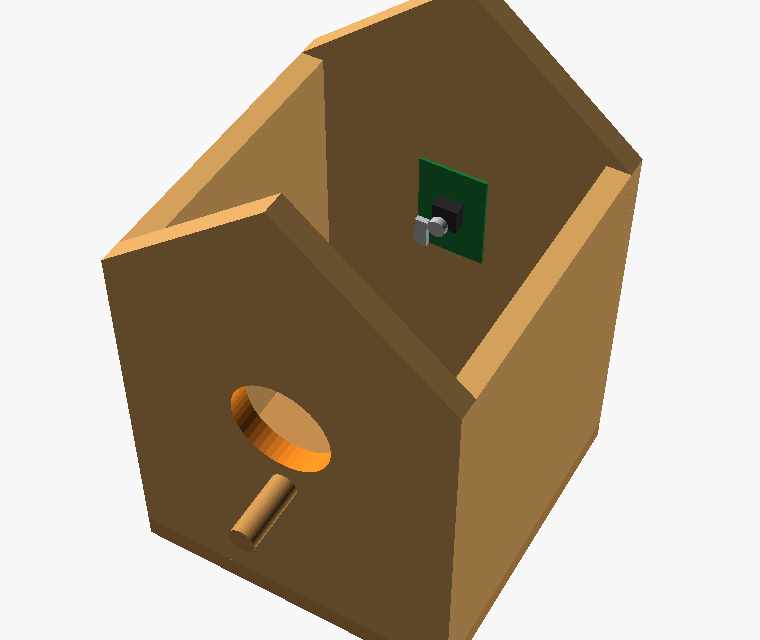
Step 4: Mount the Camera
Mount the ESP32-CAM against the inside of the back wall at entrance height, lens aimed at the hole. Fix with nylon standoffs or hot glue. Alternatively, drill a 9–10 mm hole in the front and mount the lens flush.
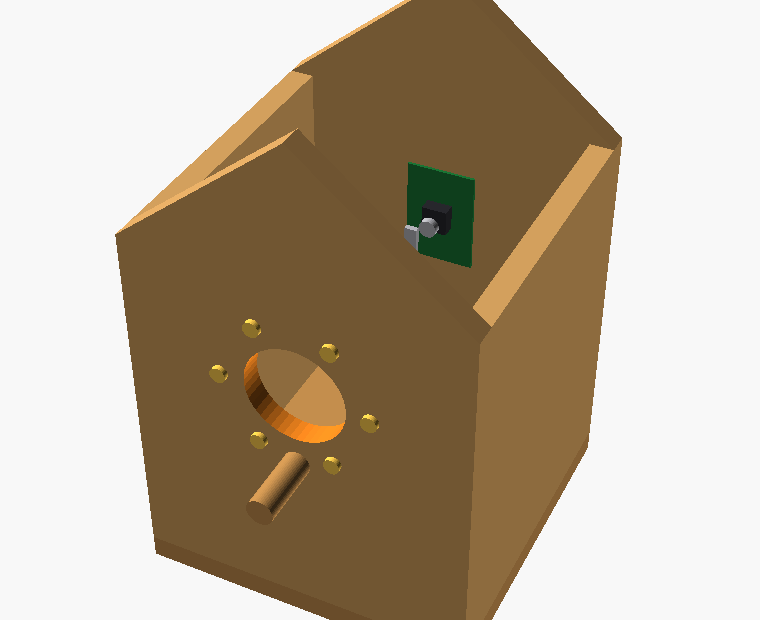
Step 5: LED Ring
Mark three to six points on a ~28 mm radius around the entrance. Drill 5 mm holes, push LEDs in from outside, and wire them on the inside. Each LED gets its own 150 Ω current-limiting resistor.
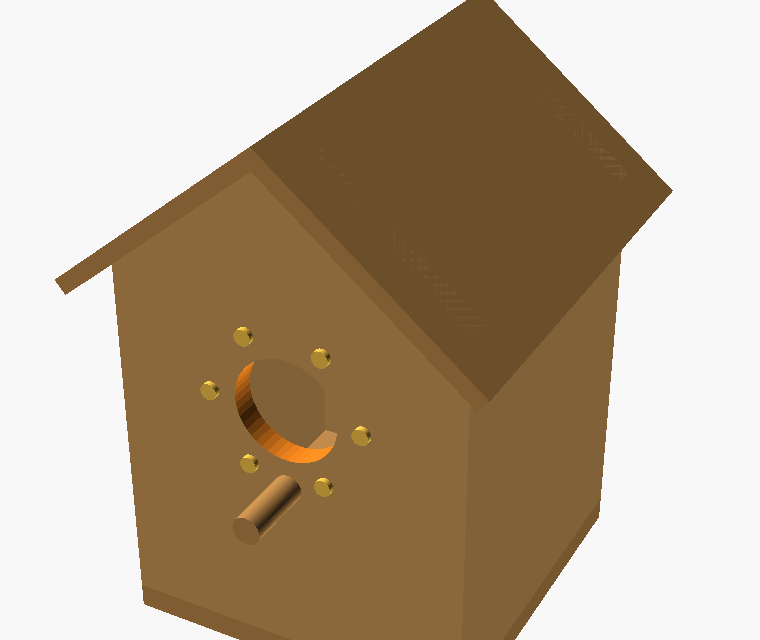
Step 6: Roof On (One Panel Removable)
Attach the roof, but make one slope removable with screws or small magnets so you can always reach the electronics. Test everything before the final close-up.
Step 7: Light Sensor & Power
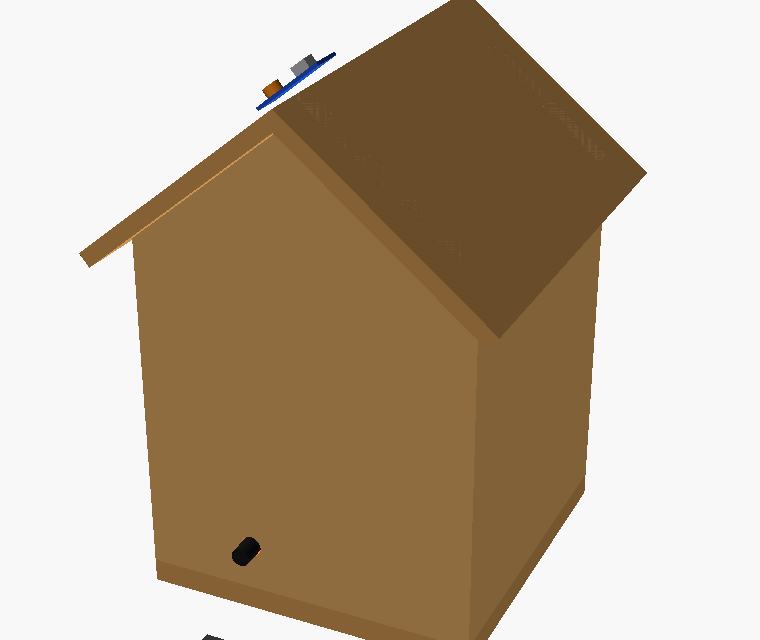
Mount the LM393 module on the roof exterior with the photoresistor facing the sky (not your own LEDs — or it’ll never decide it’s dark). Drill a small cable hole low in the back, route power to a USB bank, and seal with silicone.
Step 8: Seal, Paint & Mount
Seal or paint the outside with a water-based exterior finish. Keep electronics dry. Mount the birdhouse 5–10 feet up, entrance away from prevailing wind and harsh sun, within WiFi range of your router.
Wiring & Electronics
Breadboard First
Always prototype on a breadboard before soldering anything permanent. This lets you test and troubleshoot without risk.
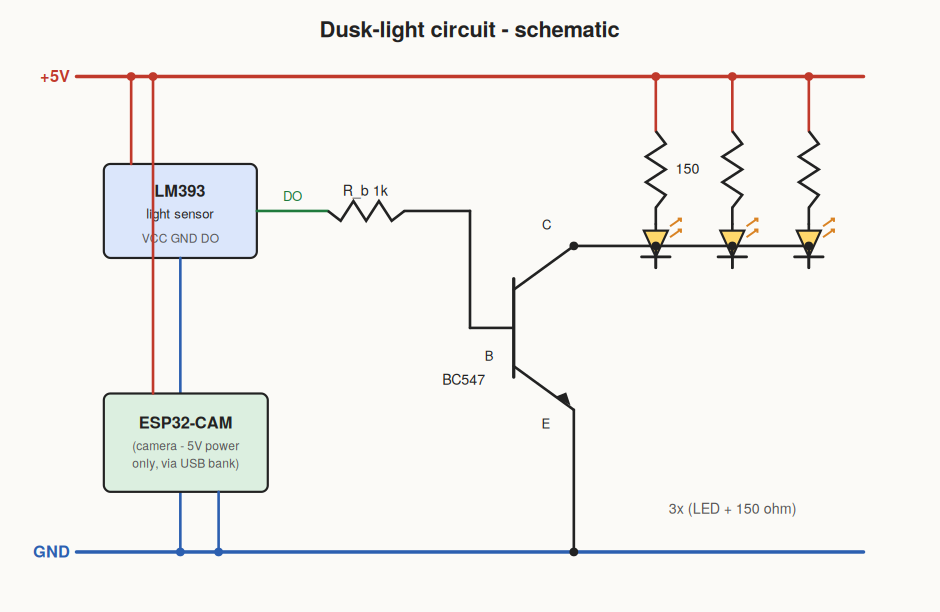
How the Dusk-Light Circuit Works
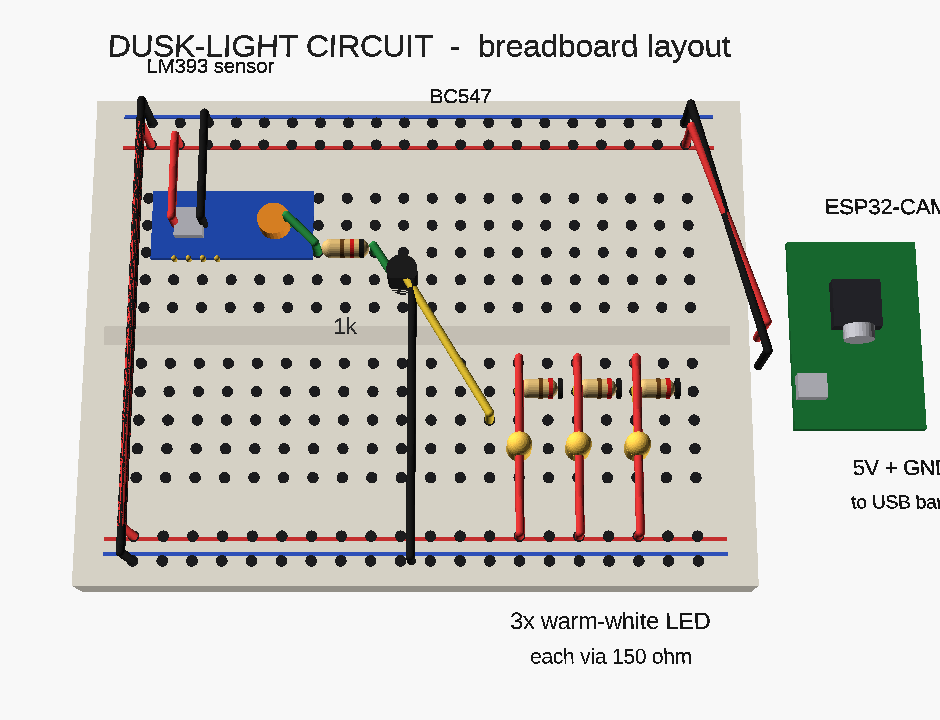
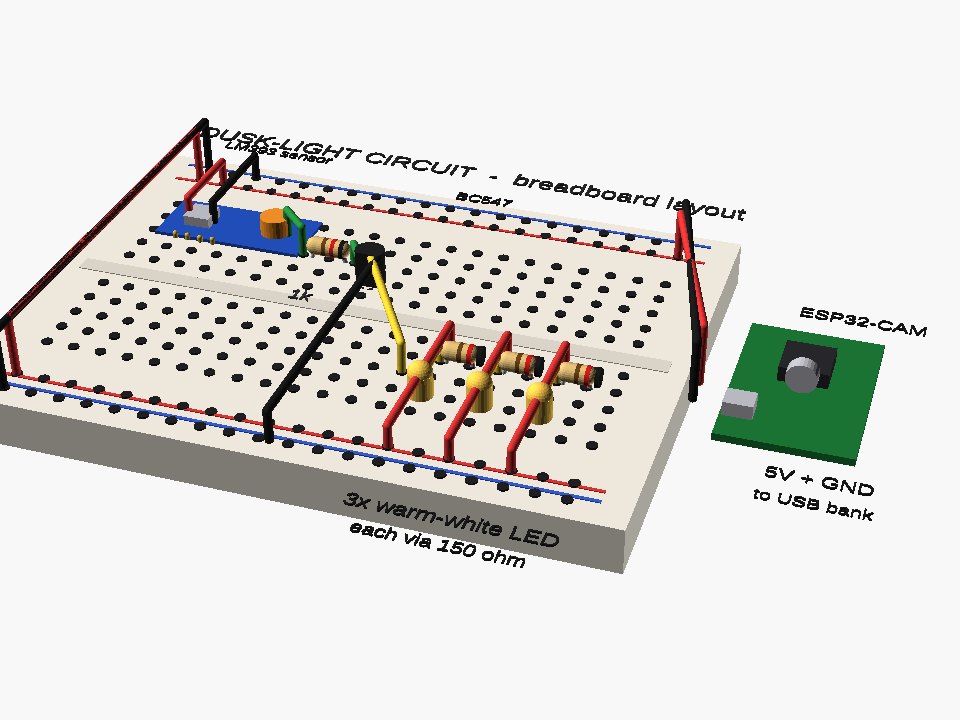
| From | To | Wire |
|---|---|---|
| ESP32-CAM 5 V | +5 V rail | Red |
| ESP32-CAM GND | GND rail | Black |
| LM393 VCC | +5 V rail | Red |
| LM393 GND | GND rail | Black |
| LM393 DO | 1 kΩ → BC547 base | Green |
| BC547 emitter | GND rail | Black |
| BC547 collector | LED cathodes (common) | Yellow |
| +5 V rail | 150 Ω → each LED anode | Red |
Dark → LM393 DO goes HIGH → base current through 1 kΩ → BC547 turns on → LEDs light up. Bright → DO goes LOW → transistor off → LEDs off. Adjust the threshold with the trim pot at dusk.
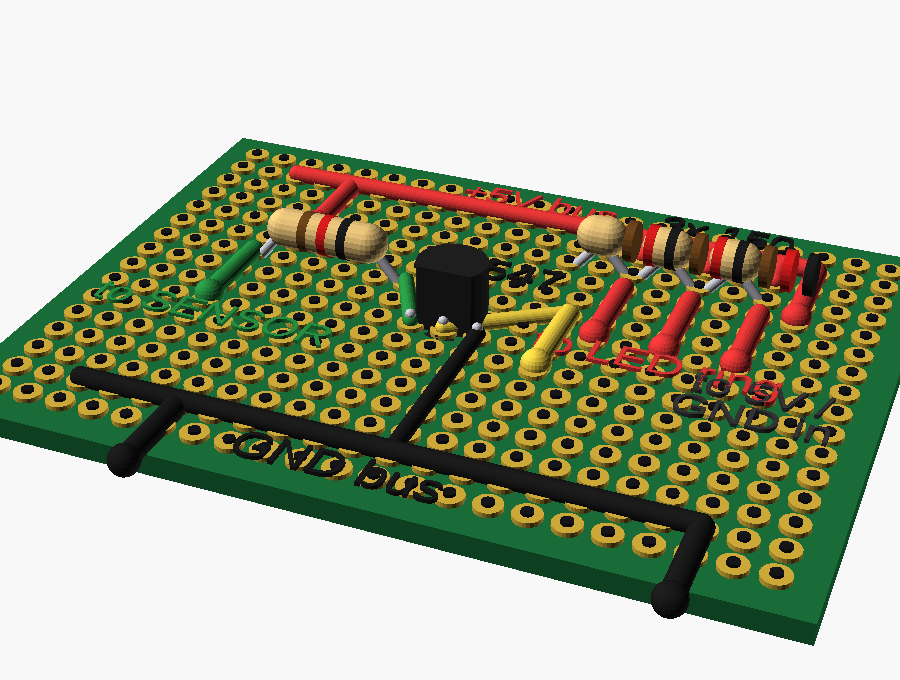
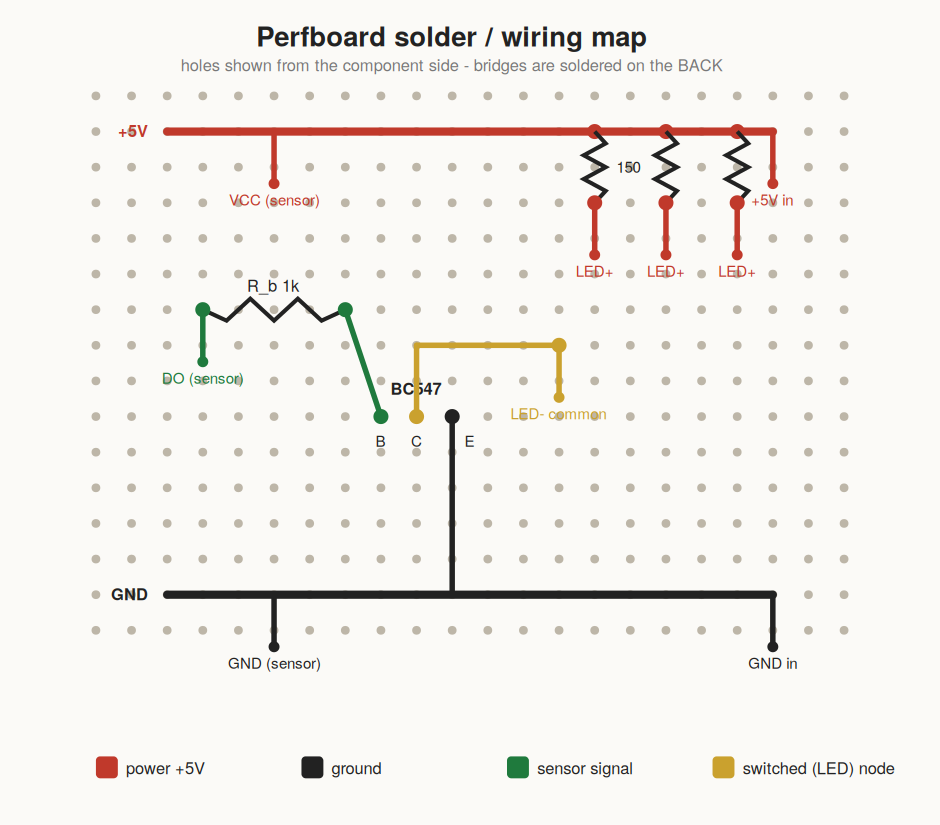
Soldered Perfboard
Once everything works on the breadboard, transfer to perfboard for a permanent build.
Camera Software Setup
- Install the Arduino IDE and add ESP32 board support via Boards Manager.
- Open File → Examples → ESP32 → Camera → CameraWebServer.
- Uncomment
CAMERA_MODEL_AI_THINKERand enter your WiFi SSID and password. - Select board “AI Thinker ESP32-CAM” and the correct COM port. Upload (the MB shield makes this plug-and-play).
- Open Serial Monitor at 115200 baud, press reset, copy the IP address, and open it in a browser on the same WiFi network.
- For smooth streaming, set frame size to CIF or VGA and quality to ~12.
Weatherproofing & Placement
- Coat circuit boards with conformal coating or clear nail polish.
- Keep the ESP32-CAM in a small clear plastic box inside, or use nylon standoffs to isolate it from the wood.
- Leave a drip loop in the power cable and a vent gap in the roof.
- Mount 5–10 ft up, entrance away from prevailing wind and harsh sun, within WiFi range.
- The photoresistor goes outside but must be shielded from your own LEDs.
Bird Welfare
- If real birds will nest: do NOT light the interior at night. Use an IR-version camera with IR LEDs for invisible night vision.
- Match entrance hole diameter to the target species (32 mm for chickadees/wrens, 38 mm for bluebirds).
- Keep electronics in the roof cavity, not the nest space.
- Ventilate the house and clean it out between nesting seasons.
- If it’s a decorative porch piece, light it however you like.
Troubleshooting
| Symptom | Fix |
|---|---|
| Boot loops / “brownout” | Weak 5 V — use a better supply or shorter/thicker USB cable |
| ”Camera init failed 0x20004” | Reseat the camera ribbon cable; confirm AI_THINKER model is selected |
| Won’t upload | GPIO0 to GND during upload, press reset, lower baud rate |
| Laggy stream | Lower frame size/quality; move closer to router |
| LEDs always on/off | Adjust trim pot; check DO logic (some boards are inverted); verify transistor pinout (EBC) |
Make It Easier
- Use a fully pre-cut birdhouse kit (no sawing)
- Skip the dusk-light circuit and just build the camera
- Use the breadboard version as the final build (no soldering)
Make It Harder
- Add a slide switch to disable the LEDs
- Motion-triggered snapshots saved to SD card
- Add a DHT temperature/humidity sensor
- Solar panel + 18650 battery charging
- Email or Telegram photo alerts
- Train a simple “bird / no bird” image classifier on saved snapshots
What Your Kid Learns
Breadboard prototyping, soldering, reading schematics, transistor switching circuits, Arduino IDE, WiFi streaming, woodworking, weatherproofing, bird habitat design